
A few seasons ago, a club player came to me convinced his serve was broken.
He was thirty-four, played three times a week, and had spent the best part of a year trying to fix a second serve that kept sitting up and getting punished. He’d read the articles. He’d watched the YouTube videos. He’d bought the resistance bands. He’d even changed his grip twice, on the advice of two different people at his club who disagreed with each other.
He’d also filmed himself. Dozens of times. He showed me the clips on his phone — twenty-odd videos, all shot from the same spot behind the baseline, all watched once at full speed, all telling him precisely nothing.
“I can see it’s wrong,” he said. “I just can’t see why.”
That sentence is the whole problem, and if you’ve ever propped your phone against a tennis bag and served twenty balls into an empty court, you already know the feeling. Filming yourself is easy. Reading the footage is the skill nobody teaches you.
So we sat down and went through his clips properly — slowed to a quarter speed, stepped through frame by frame, against a fixed list of checkpoints. It took eleven minutes. His grip was fine. His fitness was fine. His problem was that his tossing arm dropped a fraction early, which pulled his shoulders open before the racket had finished loading, which meant every ounce of power came from his arm instead of his legs and trunk.
He’d been solving the wrong problem for a year. The answer had been sitting on his phone the whole time.
This guide is the method we used, written out in full, so you can do it yourself — with nothing more than the phone in your pocket.
The method itself is simple enough to state in a sentence. To analyse your tennis serve at home, film it from three angles — side-on, behind, and front-facing — at 60 frames per second or higher, then review the footage frame by frame at 0.25x speed against a fixed checklist: trophy position, racket drop, leg drive, contact point, and follow-through. Almost every technical fault worth fixing is visible somewhere in the 0.4 seconds between trophy position and contact. The rest of this article is about doing each of those steps properly.
What You Need to Film Your Serve at Home
Almost nothing. This is the part people overcomplicate.
Any smartphone made in the last five years shoots at 60 frames per second, and most shoot at 120fps or 240fps in slow-motion mode. That is more than enough. Professional biomechanics labs use high-speed cameras because they’re measuring joint angles to the degree — you’re looking for faults you can see with your own eyes once the footage is slow enough.
| What you need | Cost | What it gets you |
| Smartphone at 60fps+ | Already own it | Frame-by-frame review of the whole motion |
| Tripod, fence clip, or a bag | £0–£20 | A stable frame — the single biggest quality factor |
| A second phone | Optional | Two angles in one session, saves time |
| Any app with 0.25x playback | Free | Frame stepping and side-by-side comparison |
| A basket of 20–30 balls | Already own them | Enough repetitions to spot a pattern, not a one-off |
One thing genuinely matters more than the rest: stability. A phone wedged in a fence at a slight angle will make you diagnose problems that don’t exist. Every clip you compare has to be shot from the same place, or you’re comparing camera positions rather than serves.
And film in landscape. Portrait footage crops out your feet or your racket at the top of the swing — usually the exact thing you needed to see.
The Three Camera Angles That Actually Matter
Ninety per cent of players film from one angle: behind, from the fence. It’s the most convenient position and the least informative one on its own.
Each of the three angles reveals a different category of fault. If you only ever shoot one, you’ll only ever fix one kind of problem.
Side-on (level with the baseline)
Place the camera roughly 3 metres to your side, at hip height, directly level with the baseline.
This is your most valuable angle. It shows knee bend depth, back arch, how far the toss travels into the court, contact height relative to your body, and whether you’re actually landing inside the baseline.
If you can only film one angle, film this one.
From behind (baseline, centre)
Camera 4–5 metres behind you, at shoulder height, lined up with where you stand to serve.
This angle shows toss placement left-to-right, shoulder rotation, hip-shoulder separation, and pronation through contact. It’s also the angle that shows whether your toss is genuinely consistent — plot where the ball peaks across ten serves and the pattern is instantly obvious.
Front-on (from the receiving end)
Camera at the opposite baseline, chest height, ideally slightly off to one side for safety.
This shows body alignment, racket path through the hitting zone, and whether your head stays up through contact. It’s the angle players skip most and the one that most often explains an inconsistent toss.
Whichever angle you choose, film ten serves rather than three. A single bad serve tells you nothing at all — it might have been a gust of wind or a moment’s lapse in concentration. Ten serves tell you what your body actually defaults to when there’s no pressure on you, and that default is the best-case version of what happens in a match.
How to Serve in Tennis: The Six Phases You’re Analysing
Before you can spot a fault, you need to know what you’re looking at. Every serve — from a beginner’s to a Grand Slam champion’s — moves through the same six phases. When people ask how do you serve in tennis, this is the honest answer: it’s one continuous motion, but it’s built from six checkpoints that either line up or don’t.
1. Stance and setup
Your feet, weight distribution, and grip before anything moves. Two main options: the platform stance, where the feet stay apart throughout, and the pinpoint stance, where the back foot slides up to meet the front. Neither is better. Platform tends to be more stable and repeatable; pinpoint can generate more upward drive.
On video: are your feet in the same position every single serve? Most players think they are. Most players are wrong.
2. The ball toss
The toss is the foundation, and it is the single most common source of serve problems at club level. For a flat first serve, the ball should peak slightly into the court and marginally to your hitting side, at a height where it’s just beginning to drop as you make contact.
On video: freeze the frame at the toss’s peak. Do that for ten serves. If the ball is in a different place each time, stop reading and go and practise your toss. Nothing downstream can be fixed until this is stable.
3. Trophy position
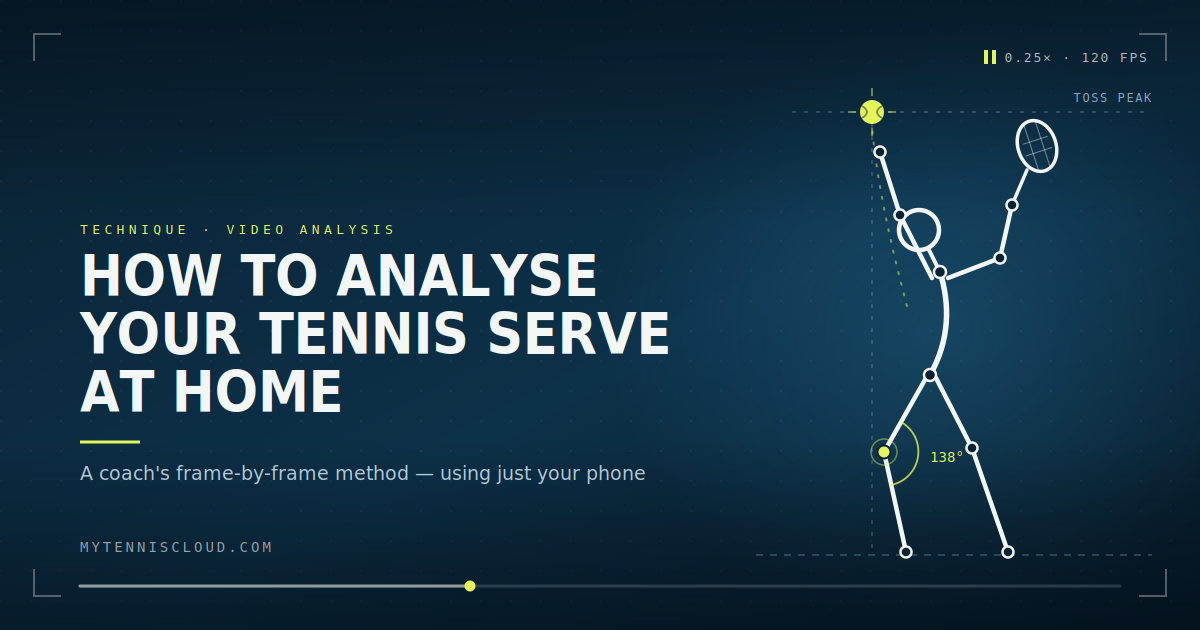
The trophy position is the moment in the service motion when the tossing arm is fully extended upwards and the racket arm is cocked back and up, forming an L-shape. It’s named after the little figure on top of a tennis trophy.
On video: at this exact frame, is your front shoulder pointing at your target? Are your knees bent? Is your tossing arm still up, or has it already started to drop? This one frame will tell you more than the other five combined.
4. Racket drop
From the trophy position, the racket head falls behind your back. You do not make this happen — a relaxed arm produces it automatically as the body begins to uncoil. The old “scratch your back” coaching cue creates more stiff, arm-driven serves than almost any other instruction in tennis.
On video: does the racket head drop smoothly, or does it look muscled into place? Tension here is visible, and it’s the difference between a whip and a hammer. This is precisely the mechanism I break down in the Rigidity vs Relaxation at Impact course — it’s the concept most club players have never had explained properly.
5. Leg drive and contact
The legs push up, not forward. The energy travels from the ground through the legs, into the hips, through the trunk, into the shoulder, down the arm, into the racket. This is the kinetic chain, and every link that leaks energy costs you speed you’ll never get back.
On video: are you leaving the ground? Are you landing inside the baseline on your front foot? Is contact happening at full extension, or are you bending your elbow to reach a toss that was too low?
6. Pronation and follow-through
At contact, the forearm rotates so the palm turns outwards — pronation. This is where a genuinely large share of your racket-head speed comes from, and it’s almost entirely absent in players who serve with a continental grip but a forehand-grip mindset.
On video: step through the four frames around contact. Does the racket face rotate through the ball, or does it stay flat and push? Then check the finish — the racket should decelerate across your body, not stop dead.
The 9-Point Serve Checkpoint
This is the framework I use for every technical video analysis I do, and it’s what turns a pile of footage into an actual diagnosis. Work through it in order. Do not skip ahead — faults cascade downwards, and fixing point 7 when the real problem is at point 2 is how players waste entire seasons.
| # | Checkpoint | What good looks like | Most common fault |
| 1 | Foot position | Identical on every serve | Feet drift between serves |
| 2 | Toss consistency | Ball peaks in the same spot ten times out of ten | Toss varies by 30cm or more |
| 3 | Toss height | Ball just starting to fall at contact | Tossed too high, forcing a wait |
| 4 | Trophy position | Front shoulder to target, knees loaded | Shoulders already open |
| 5 | Tossing arm | Stays up until the racket starts forward | Drops early, opening the chest |
| 6 | Racket drop | Smooth, relaxed, deep behind the back | Tense, shallow, muscled |
| 7 | Leg drive | Upward push, feet leave the ground | Serving flat-footed, arm only |
| 8 | Contact point | Full extension, above and slightly in front | Low contact, bent elbow |
| 9 | Pronation & landing | Forearm rotates, land inside the baseline on front foot | No rotation, land on back foot |
Screenshot this table. Take it to the court. Score yourself out of nine after each filming session and track the number over a few weeks — improvement you can measure is improvement you’ll actually stick with.
You’ll find drills that target each of these checkpoints inside the MyTennisCloud training library, and you can watch a demo of how the library works before committing to anything.
How Fast Is Your Serve, Really?
Once players start filming themselves, this is always the next question. So let’s deal with both halves of it — the records at the very top, and how to work out where you actually sit.
The fastest tennis serve ever recorded
There’s genuine confusion online here, because two different records get reported as “the fastest tennis serve” and both are correct depending on how you define it.
| Record | Player | Speed | Where | Year |
| Fastest ever recorded (men’s) | Sam Groth (AUS) | 263.4 km/h (163.7 mph) | Busan Open Challenger | 2012 |
| Fastest ATP-recognised (men’s) | John Isner (USA) | 253.0 km/h (157.2 mph) | Davis Cup | 2016 |
| Fastest ever recorded (women’s) | Georgina García Pérez (ESP) | 220.0 km/h (136.7 mph) | Hungarian Ladies Open qualifying | 2018 |
| Fastest WTA-recognised (women’s) | Sabine Lisicki (GER) | 210.8 km/h (131.0 mph) | Stanford Classic | 2014 |
Groth’s serve is the fastest ever measured in a professional match, but because it came at a Challenger-level event, the ATP doesn’t list it as the official tour record. That distinction belongs to Isner. It’s worth knowing that neither the ATP, WTA nor ITF maintains a formal serve-speed ranking, and radar calibration varies between venues — so treat every figure on this list as accurate rather than absolute. You can check current tour serve statistics at the ATP Tour and WTA official sites.
Estimating your own serve speed at home
You don’t need a radar gun. You need arithmetic.
- Film side-on at a known frame rate (60fps, 120fps or 240fps — check your camera settings).
- Count the frames from contact to first bounce.
- Divide the frame count by the frame rate to get the time in seconds.
- Measure the distance from your contact point to the bounce mark. From the baseline to the service line is 18.3 metres; contact happens roughly 0.5m inside that.
- Speed (m/s) = distance ÷ time. Multiply by 3.6 for km/h, or by 2.24 for mph.
Worked example: you film at 120fps. Contact to bounce takes 22 frames. That’s 22 ÷ 120 = 0.183 seconds. The ball travelled about 18.5 metres. 18.5 ÷ 0.183 = 101 m/s ≈ 364 km/h.
That figure is obviously wrong — which teaches you the most important thing about this method. Air resistance and gravity mean the ball slows continuously, so this calculation gives you an average over the flight, and small measurement errors get magnified badly. Use it to track change over time rather than to quote a number at your club. If your frame count drops from 26 to 23 across a season on the same setup, you’ve got faster. That’s the useful information.
Here’s a realistic sense of where club players sit:
| Level | Typical first serve |
| Recreational adult | 100–140 km/h (62–87 mph) |
| Strong club player | 140–170 km/h (87–106 mph) |
| County / national junior | 170–195 km/h (106–121 mph) |
| Professional (men’s tour) | 190–220 km/h (118–137 mph) |
If those numbers feel low against the records above, that’s the point. Chasing raw speed is the wrong goal for almost everyone reading this. A 150 km/h serve you land 65% of the time wins far more matches than a 175 km/h serve you land 40% of the time. Consistency, placement and disguise beat velocity at every level below the professional tour, and often at it too.
Why Do Tennis Players Bounce the Ball Before Serving?
Watch any professional match and you’ll see it — three bounces, five bounces, sometimes a dozen. Novak Djokovic’s ball-bouncing has become almost as recognisable as his return of serve.
The short answer: players bounce the ball before serving to regulate rhythm and timing, lower heart rate between points, focus attention onto the immediate task, and trigger a consistent motor pattern. It’s a pre-performance routine, and the physical bouncing is far less important than the consistency of it.
Four things are happening:
- Rhythm — the bounce sets the tempo for the whole motion. A rushed bounce almost always produces a rushed toss.
- Arousal control — points end at high intensity. The bounce is a deliberate reset that brings heart rate and breathing down before the most technical shot in tennis.
- Attentional focus — it narrows attention from the scoreboard, the last point, the opponent, down to one ball in one hand.
- Motor pattern triggering — a repeated cue tells the body which movement is coming, and grooved routines are more resistant to breaking down under pressure.
Under the ITF’s serve clock, players have 25 seconds between points, which is what shapes the length of these routines at tour level.
Now bring this back to your footage. When you review your ten serves, watch what happens before the motion starts. Is your routine identical every time? Same number of bounces, same rhythm, same breath? If it isn’t, you’ve found a hidden cause of the toss inconsistency you flagged at checkpoint 2 — and it’s a far easier fix than rebuilding your technique.
This connection between the mental routine and the physical motion sits at the heart of the coaching mindset work I do with players. Technique that holds up in practice but collapses at 4-5 in the third set is almost never a technical problem.
Seven Serve Faults You Can Spot on Your Own Video
| Fault | What it looks like on video | How to start fixing it |
| Inconsistent toss | Ball peaks in a different spot each serve | Toss-only drill: 20 tosses, no racket, land the ball on a target coin |
| Early shoulder rotation | Chest faces the net at trophy position | Slow-motion shadow serves, holding trophy position for 2 seconds |
| Tossing arm drops early | Left arm (for right-handers) already down at trophy | Serve while consciously holding the tossing arm up an extra beat |
| No leg drive | Feet never leave the ground | Serve from a deep knee bend, exaggerating the upward push |
| Arm-only swing | Racket drop looks stiff and shallow | Drop the racket entirely and throw a ball overarm — feel the whip |
| Low contact point | Elbow bent at contact | Raise the toss target; serve reaching for maximum extension |
| No pronation | Racket face stays square through contact | Serve at 50% pace focusing only on turning the palm outwards |
Work on one of these at a time. Trying to fix three simultaneously produces a serve that’s worse than the one you started with — this is the most common self-coaching mistake I see.
Where Self-Analysis Stops, and a Coach Starts
I want to be straight with you about the limits of what you’ve just read, because the internet is full of people pretending otherwise.
You can absolutely diagnose on your own: toss consistency, contact height, whether you’re using your legs, whether your feet are stable, whether your routine is repeatable. These are visible, obvious, and correctable with honest footage and the checklist above. Many players fix a long-standing problem in a fortnight this way.
What you can’t see on your own:
- Compensation patterns. A fault at contact is often the body solving an earlier problem. Without knowing which link in the chain failed first, you’ll fix the symptom and the cause will simply reappear elsewhere.
- Timing and sequencing. Whether your hips fire before your shoulders isn’t something you can eyeball. It needs frame-by-frame measurement against a known model.
- Injury risk mechanics. Shoulder and lower-back loading patterns in the serve don’t hurt until they do. This is the one I care about most, particularly with juniors.
- Comparison to a matched profile. Copying a professional whose body type, height and levers are nothing like yours is actively counterproductive. What matters is comparison against a player of your profile.
That last point is the core of how I work. In my technical video analysis service, I go through your footage frame by frame, break down the nine key dynamic motions and positions of the body at impact, and compare them against professional players with a similar physical profile to yours — not against whoever happens to be world number one. There are Silver and Gold tiers depending on how many shots and how much follow-up you want.
You can read what players have said about the process before you decide anything.
Start This Week
Here’s your homework, and it takes one session:
- Film ten first serves side-on and ten from behind.
- Watch them at 0.25x, then step through frame by frame.
- Score yourself against the 9-Point Serve Checkpoint.
- Pick the lowest-numbered checkpoint you failed. That’s your only project for the next fortnight.
- Film again in two weeks from the same positions and compare.
That’s it. No new racket, no new grip, no bands.
The player I mentioned at the start? He fixed his tossing arm in about three weeks. His second serve stopped sitting up not because he got stronger, but because his shoulders finally stayed closed long enough for his body to do the work his arm had been doing alone.
The footage was always there. He just needed to know what he was looking at.
Ready to have someone else look at your footage? Book a technical video analysis and I’ll break down your serve frame by frame — or get in touch if you’d like to talk it through first.
About the author
Yves Latreille is the founder of MyTennisCloud and has spent over 30 years coaching players, parents and coaches across the physical, technical, tactical and psychological aspects of performance. He holds international certifications, including GPTCA, RPT, ICA, USSA and Volodalen, and works with players worldwide through online video analysis, structured LMS courses and live coaching sessions.